One thing I have learned when it comes to gifts to the Grandparents is that they love the homemade gifts. Especially my Mom. And the look on Alivia's face when she gives those gifts is priceless. This year we painted some of the wooden knick knacks I had picked up when browsing the Target "One Spot". This birdhouse was fun and easy and looks great hanging out with Grandma's house plants. To mix things up a bit we painted the house one color and then took a sponge and painted overtop for a textured look. I kind of wish I had one of my own now!
Wednesday, May 30, 2012
Tuesday, May 29, 2012
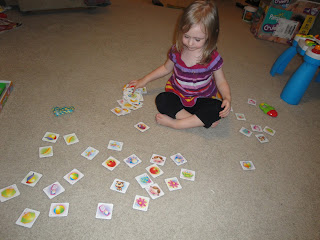
Playing Memory...Toddler Style
I loved the game Memory as a kid and couldn't pass it up when it was one of the deals on Black Friday a couple of years ago. Liv is just now starting to get into playing by the actual rules but on days when we just don't quite have the time we go back to playing our simplified version.
Start by laying all of the cards face up and match away. Sometimes we take turns, sometimes we just find what we can, and on days like today I tell her which picture she needs to find. It is always a good time. Even when little brother escapes with a couple of the pieces!
Start by laying all of the cards face up and match away. Sometimes we take turns, sometimes we just find what we can, and on days like today I tell her which picture she needs to find. It is always a good time. Even when little brother escapes with a couple of the pieces!
Friday, May 4, 2012
Fingerpaint Art
I am going to call this a trial run because I really like how this project turned out and I think it would be cute on a little canvas in Alivia's room. This project is super fun, super easy, and super messy. Three things I really like!
What You Need
Painters tape
Fingerpaint Paper (or any type of paper that will allow the tape to peel off easily)
Fingerpaints
Directions
1. Using the painters tape mark out a design on your paper. We made the letter A since we are working on writing Alivia's name.

2. Squirt fingerpaints onto the paper and start painting.
3. Once your project is dry carefully peel back the tape revealing your design.
The possibilites with your design for this project are endless so have fun!
Tuesday, May 1, 2012
Happy May Day!
In honor of May Day we decided to make these cute little flowers. Plus we have tons of tissue paper lying about after celebrating Liv's birthday. This project was a lot of fun and really easy to do.
What You Need
Tissue paper
Glue
Safety Scissors (if your kiddo is learning to cut)
Construction Paper
Marker/Crayon
Directions
1) Cut a piece of green construction paper in half and draw lines for your little one to follow as they cut.
Looks are deceiving I actually had to help her cut most of the time.
2) Glue the lines to a sheet of paper.
3) Cut the tissue paper into approx 4 inch squares (I cut these out myself). Have your little one wad the paper up into a ball.
4) Glue the tissue paper onto the green stem to create your flower. We glued an additional wad of paper into that to add a little more dimension.
5) Sit back and admire. Or have your little one decorate the remaining paper with colors, markers, stickers, etc.
Subscribe to:
Comments (Atom)


