Showing posts with label Halloween. Show all posts

Wednesday, October 31, 2012

Candy Corn Necklace

Happy Halloween! This little necklace actually came home with Alivia from school one day. I thought the idea was much to cute to not share. She even wanted to make another one she had so much fun making the first.

(Getting an enthused smile is next to impossible these days)

What You Need

Crayons
Paper Plate
Yarn
Scissors

What To Do

1. Cut the paper plate into "pie" pieces.

2. Have your little one color sections of each paper plate pie piece using yellow, orange, and white.

3. Punch two holes on the bottom of the candy corn pieces.

4. Thread the yarn through each piece.

5. Wear your fashionable holiday attire!


Have fun tonight trick or treating and be safe :)

Friday, October 26, 2012

Footprint Ghosts

What kid does not like painting their hands or feet? Both kids had fun with this project. Bennett was a little skeptical at first but after watching big sis take her turn he was ready to go. This was a great project to do before bedtime and kept the kids entertained.

What You Need

Construction Paper
Paint
Googly Eyes
Marker
Cute Little Feet

What To Do

1. Paint those piggies and place the foot on the construction paper.

2. Glue the googly eyes onto the top of the ghosts. (Ignore the mess...we get a little crazy with our glue sometimes!)
 
 
3. Draw a circle for the mouth.

4. Hang your spooky artwork.

Wednesday, October 24, 2012

Rollout Sugar Cookies

I have been afraid to make these cookies for quite some time. I think the reason that my mother is a baker extraordinaire has always sent me running from any type of baking. This recipe came from her and suprisingly it was very easy and pretty fool proof! Alivia had a blast making them and enjoyed sharing them with her cousins who were in town. Lucky for us the recipe only makes about 2 dozen medium sized cookies so they were gone in a couple of days.

Ingredients

1 c. oleo
1 c. sugar
1 egg
2 t. baking powder
1 t. vanilla
3 c. flour

Frosting - Powdered sugar, milk, food coloring

Instructions

Preheat oven 400 degrees. In large bowl cream butter and sugar. Beat in egg and vanilla. Add baking powder and flour one cup at a time, mixing after each addition. The dough will be very stiff, blend last in by hand. Do not chill, divide dough into 2 balls. On a floured surface roll each ball flat. Bake until cookies are slightly brown on edges.


We did a simple frosting for the cookies. I mixed about 3 tablespoons of powdered sugar, 1 teaspoon of milk (want slightly runny), and food coloring of color choice. Once I had the frosting the color and consistency that I liked I put into a plastic baggy and snipped the end with scissors to create a frosting bag. It was messy....but fun! Enjoy!!!

Monday, October 22, 2012

Pumpkin Mosaic

Our 3 year old is getting very good with the scissors. A lot of the projects we did do over summer involved her cutting something. So this project started with her cutting strips of orange paper and then we tore them into smaller pieces. Baby brother who is 1 year old even helped with that process.

What You Need

Construction Paper
Scissors
Glue
White Paper


Directions

1. First you need a picture of a pumpkin. You can either search for a coloring page online, freehand a pumpkin yourself, or if someone could tell me how to attach a pdf of what I used I would be happy to share my quick drawing (I am not sure how to do this!).

2. Once you have your template have your little one cut/tear out tiny squares of paper. Both Liv and I cut strips of paper about an inch wide and then tore the paper into smaller sections.

3. Using glue adhere the tiny squares onto the pumpkin until it has been filled in.


4. Sit back and enjoy your fine piece of art!


Sunday, October 21, 2012

Pumpkins, Pumpkins, Pumpkins!

We finally did something with a couple of the pumpkins we have been stockpiling over the past couple of weeks. Both of the kiddos love to paint and instead of just letting them slather it on I like to make it a little more interesting. Before we got started we just simply placed some stickers onto their pumpkins and let them paint away. Once the pumpkins were dry we peeled off the stickers and tada....fancy schmancy personalized pumpkins. We use Crayola kids paint and it works great. This project is fun for all ages. It was fun for our 1 year old as well as for Great Grandma who stopped by :)


Wednesday, October 5, 2011

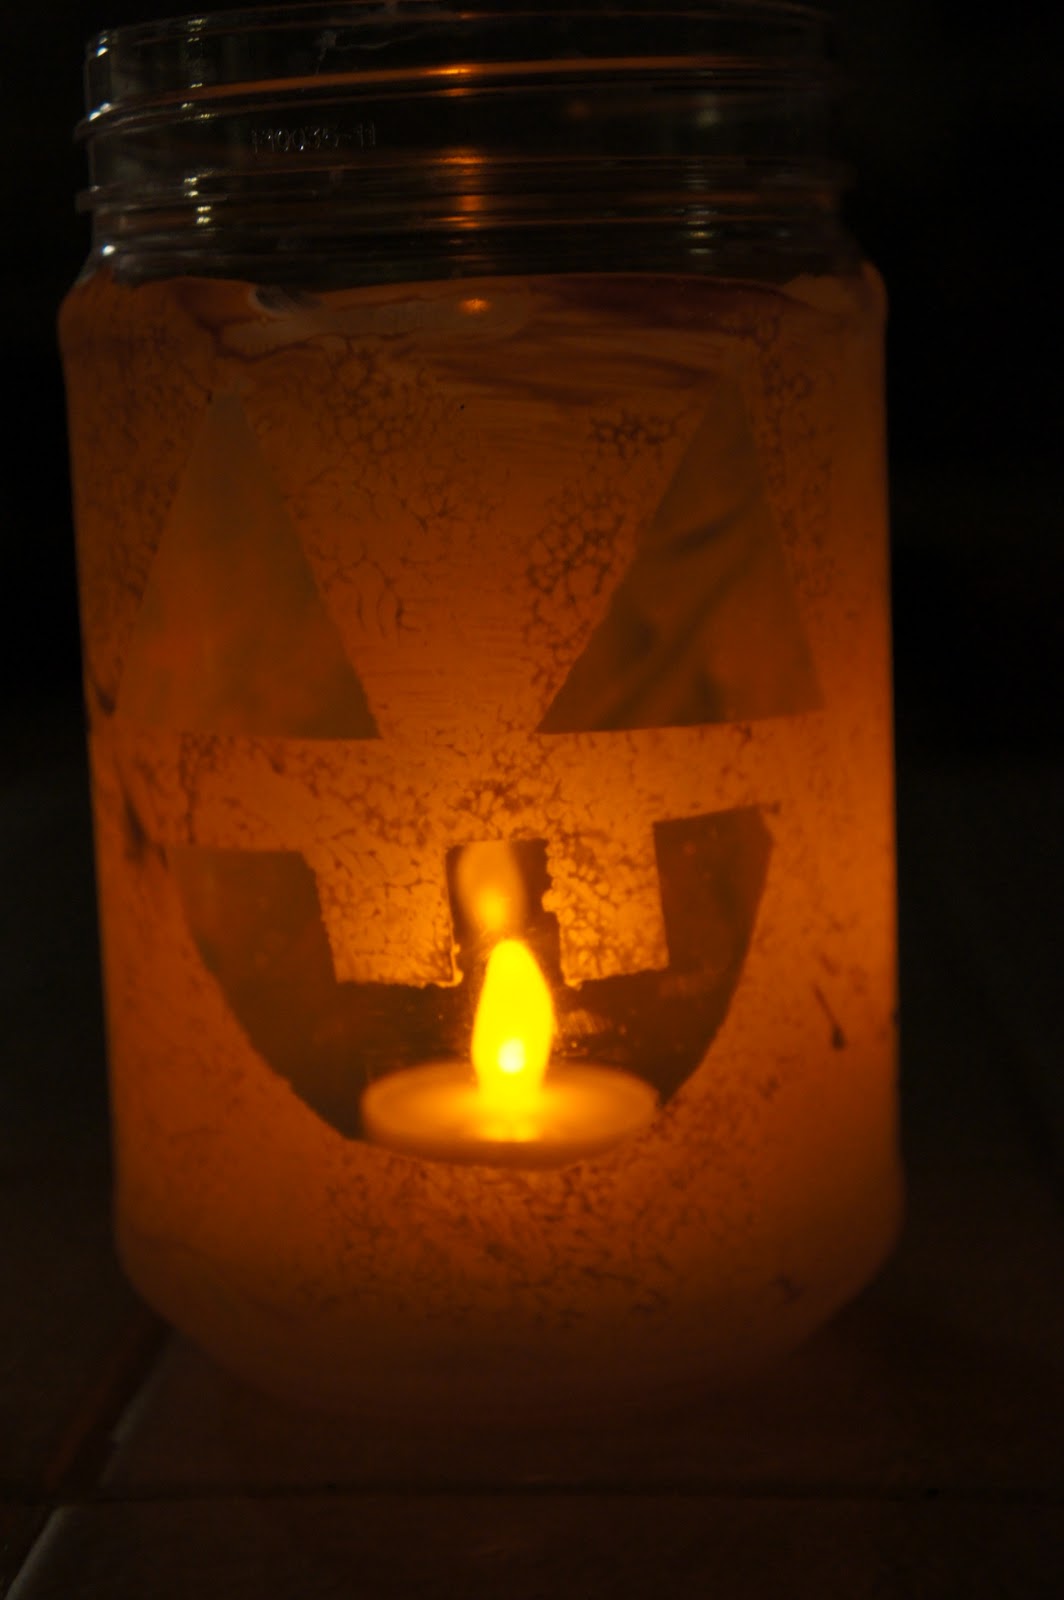
Jack-o-Lantern

This craft turned out super cute and was loads of fun. Thank you Disney Family Fun magazine once again! This was in the October issue. Here is how you can make your very own!

SUPPLIES

1. Plastic Jar (we used an empty peanut butter jar)

2. Painters Tape

3. Orange paint and paintbrush (we used one of those black sponge brushes which gave the jar a nice effect)

4. Battery operated tealight

DIRECTIONS


1. Using painters tape cut out the face of the pumpkin and place on jar.

2. Have your little one paint the entire jar. Sorry no picture of this since I was holding the jar while Liv painted.

3. Once dry place a battery operated tealight inside and enjoy!

Liv fell asleep with the lantern on her dresser this evening. She was so excited!

Tuesday, October 4, 2011

Window Clings

Okay I know this is not rocket science but this is a cure for boredom! I used to think window clings were somewhat tacky until I realized that Liv loved them so much! Over the summer she found some from last fall and decorated and redecorated my office window many times. So I was really excited to see some out for Halloween during my trip to the grocery store. Silly me forgot to hide them so you can guess what Liv wanted to do as soon as she got home from Grandmas. So if you haven't tried these already I definitely say you should start!


Monday, October 3, 2011

Friendly Ghosts

It is that time of the year again and I am so excited. I love the holidays (and I consider Halloween a major holiday). I have all sorts of holiday crafts planned for Liv and I can't wait to get to them. Unfortunatly the start of October also means the end of my maternity leave. I have really enjoyed the past three months but I am looking forward to establishing our permanent routine. I may not be able to post as often as I have been but I promise I will still update this blog at least once a week so be sure to keep checking back! Now onto our craft.....

SUPPLIES

Cotton Balls
Black Construction Paper
White Crayon
Paste

Directions

1. Using the white crayon draw a ghost onto the black construction paper (doesn't need to be fancy).


2. In a small snack cup mix your paste using about 3 tablespoons of flour and enough water until it becomes the consistency of glue.

3. Have your toddler dip cotton balls into the paste and start filling in the ghost you drew on the construction paper.


4. Add googly eyes!

Liv liked making this so much that we now have two ghosts in our house and I am almost out of cotton balls. Happy October!!