Monday, December 24, 2012

Popsicle Stick Christmas Tree

Yesterday was a very busy day full of last minute Christmas preparations. Both kids had to make their ornaments to hand out as gifts. We also had a special dessert to make, presents to wrap, and snow to play in. We ended up skipping Liv's nap which we paid for late in the day. But I still think we had a lot of fun! I wanted to share the ornament Bennett made. I really had no idea what he could make. He is not quite 1 1/2 and only somewhat interested in crafts of this scale. However, he did have fun and I think we have a pretty darn cute ornament to hand out to family over the next two days.

What You Need

Popsicle Sticks
Paint
Paint Brush
Embellishments
Modge Podge (If you want to have the glossy look like ours and protect it for years to come)
String to hang your ornament

What To Do

1. I started by squirting a little paint onto a plate and giving Bennett a couple of sticks and a paintbrush. This later turned into me just blobbing the paint right onto his highchair and letting him go to town on all 7 of the ornaments we needed to make. Funny story Alivia was not happy with the "missed" spots. I think they add character :)


2. Once the main layer has dried you can embelish your tree. I used Bennett's finger to mostly decorate his trees. Then I punched out stars for the top and painted some of the "missed" spots brown to represent the tree truck.

3. Once this had all dried I had hubby drill small holes at the top to loop string through.

4. If you are wanting to add a protective coat over the paint this is when you do it! I used Modge Podge for the very first time and was very impressed with the results. The colors seem more vibrant now and somehow the ornament seems more impressive.

5. Once protective coat has dried thread string through hole and wahlah...new ornament :) Bennett was so proud!


Friday, December 21, 2012

The Cardboard Box

Honestly who would have thought the best part of all of these Christmas packages arriving would be the cardboard boxes that they come in?!? Last year we had a lot of fun wrapping up one of those boxes and taking pictures for our Christmas Card.


(The look on her face is a look of pure excitement....not fear...ha ha)


This years boxes have become airplanes, houses, forts, and marker/sticker fun for all. Honestly if I want the kids out of my hair while I fix dinner or try and clean up a bit all it takes is a cardboard box. I am starting to wonder if it is to late to return some of the gifts under the tree!


(Picture turned out horrible but trust me they were not into photos...they just wanted to play!)


Wednesday, December 19, 2012

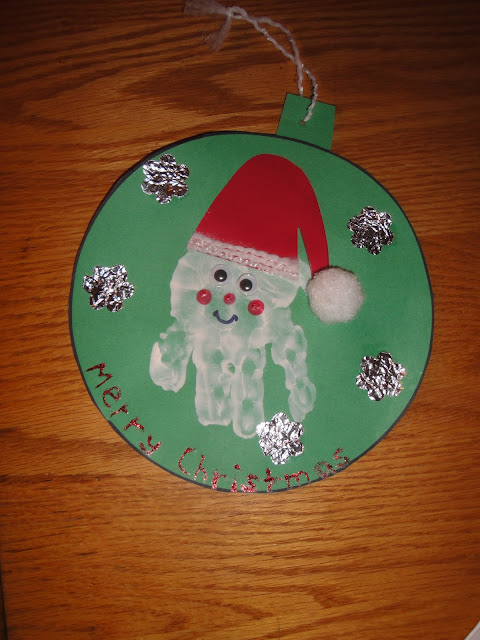
Santa Claus Handprint

I am a fulltime working mom and because I am a tax accountant I am spendng close to 60 hours a week in the office this month. So when I look in my kids bags after a long day I am always excited to find crafts that I would have loved to do with them at home. I thought this was pretty cute considering it is my sons handprint turned in to Santa Claus :)


Monday, December 10, 2012

Handprint Snowman Ornament

Every year we give a handmade ornament to family members for Christmas. This was Liv's gift last year and we had a lot of fun making these. I obviously drew on the snowmen "accessories" with a paint pen. However, if you look closely you will discover that the snow men are actually made up of Liv's handprint! 

What you need

Glass Ornaments
Ribbon to hang the ornament
Acrylic Paint/paint brush
Paintpens
Directions
1. Paint the hand of your child and have them carefully grab the ornament. You will want to be sure that the bottom of the palm is on the bottom of the ornament. You can touch up any gaps with a small brush and paint. However, I like the imperfections and kept mine as is. Also you can cover up some of the imperfections with the paint pen once you draw on the accessories.

2. Once the handprint has dried use paint pens to draw on the snowmen accessories. I did this myself once the kids were sleeping.

3. Tie a piece of ribbon to the ornament for hanging.

4. Wrap it up!

This ornament is going to be difficult to top this year. It was definitely a hit with the family and a favorite keepsake of mine as well.

Monday, December 3, 2012

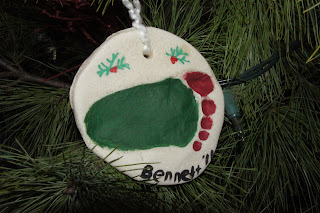
Salt Dough Ornament

Every year we like to make an ornament to hand out to family members as gifts. Because Bennett was just a baby this past year we decided his ornament would be a salt dough ornament. This ornament is super easy to make and a great keepsake for the Grandparents! You can do either a handprint or footprint. Bennett was a little so squirmy for the handprint and having learned my lesson while doing this with Liv we opted for the easy way out. Have fun!


What You Will

1/2 cup salt
1 cup flour
1/2 cup water
Rolling pin
Cookie Sheet
Toothpick
Round Cookie Cutter (A large glass will do)
Straw (To make the hole for the ribbon)
Acrylic Paints
Ribbon

Instructions

1. Preheat the oven to 250 degrees F.
2. Mix together salt, flour, and water until dough is formed.
3. Knead the dough on a floured surface until the mixture is elastic and smooth. If dough is sticky, sprinkle with flour and knead until stickiness is gone. To much flour will dry out the dough so be careful!
4. Roll the dough out to 1/4" think with a rolling pin.
5. Cut out round circles large enough for your handprint or footprint.
6. Use the straw to make a hole towards the top for the ribbon.
7. Press hand or foot into dough for imprint.
8. Place ornaments onto an ungreased cookie sheet and place into the preheated oven.
9. Bake for 2 hours.
10. Paint the ornament however you desire.
11. When dry thread the ribbon through the hole and tie in a knot.
12. Enjoy the ohs and awes on Christmas Day!

Tuesday, November 27, 2012

Paper Plate Lion

I was looking at pictures on my camera the other day and realized that I had not shared this fun craft that we did over the summer. This lion was really fun to make and Liv got to try out a lot different skills to make him.

What You Will Need

Paper Plate
Yellow Paint
Construction Paper
Googly Eyes
Paint Brush
Glue
Scissors
Black Marker

Directions

1. Paint the paper plate just like so....


2. While your toddler is painting draw horizontal lines onto pieces of construction paper. These lines will act as a guide for your toddler while they cut.  (I cut my sheets vertically before drawing the lines...I wanted the strips to be a little shorter).


3. Cut away!


4. Glue strips of paper onto the back of the paper plate.


5. Glue on Googly Eyes and draw on a mouth. We got creative and used a scrap piece of construction paper for the mouth.


Project complete! This lion decorated the front of our fridge for a few short days. Unfortunately little brother got ahold of him and tore him apart. See both kiddos had fun with this project :)

Sunday, November 25, 2012

25 Books of Christmas

I am a huge advocate for reading to your children. Each night we read at least two books before going to bed. So this summer I decided to start buying Christmas books here and there so that we could do our take on the "advent calendar" this holiday season. I was able to find several books for $3-$4 and splurged on a few of the classics. My hope is that by reading a book each night we will learn about the true meaning of Christmas and have a little fun along the way. I will admit that it will also be nice to get away from reading some of the same books every night :) Just for a little while.


I purchased a 30 qt Sterilite plastic tub from Target. I love how the books fit nicely packaged up and that they will be protected in storage after the holiday season.


I can't wait to see what book Liv picks out tonight (okay there may be more than 25 books in there...but it was hard to stop once I started). Happy Holidays!

Monday, November 5, 2012

I Love Color Wonder

Little brother has to stay busy while big sis and I do projects. What better way than using Crayola's Color Wonder products. As you can tell he was having a good time coloring his picture. And even better was that there was little cleanup for me afterwards :)

Friday, November 2, 2012

Babies Can Paint Too!

Bennett is 15 months and it is amazing how much he wants to be like big sister. I finally caved and let him in on the fun one night. He LOVED it! I used an old paint set of Liv's and dabbed some water in each color. We have even progressed to him using a little cup of water himself (although more splashing happens than actual painting!)


Wednesday, October 31, 2012

Candy Corn Necklace

Happy Halloween! This little necklace actually came home with Alivia from school one day. I thought the idea was much to cute to not share. She even wanted to make another one she had so much fun making the first.

(Getting an enthused smile is next to impossible these days)

What You Need

Crayons
Paper Plate
Yarn
Scissors

What To Do

1. Cut the paper plate into "pie" pieces.

2. Have your little one color sections of each paper plate pie piece using yellow, orange, and white.

3. Punch two holes on the bottom of the candy corn pieces.

4. Thread the yarn through each piece.

5. Wear your fashionable holiday attire!


Have fun tonight trick or treating and be safe :)

Monday, October 29, 2012

Fun with Finger Paint

I had seen something similar to this at some point in my web browsing and decided to give it a try. It did not turn out exactly how I wanted but both kids had fun (even if Bennett looks less than enthused). This is a great way to teach kids how different colors blend to make another color. As you can see the painting turned into a big mess at the end once several other colors got involved.

What You Need

Finger Paint
Paper
Plastic Wrap
Painters Tape

What To Do

1. Lay the paper down and squirt on the paint. Lay plastic wrap over top and tape around all edges.

2. Let your little one go to town mashing the paints together.


As you can see Liv could not stand not getting messy so in the end we tore off the plastic and let her have all the fun she wanted!

Friday, October 26, 2012

Footprint Ghosts

What kid does not like painting their hands or feet? Both kids had fun with this project. Bennett was a little skeptical at first but after watching big sis take her turn he was ready to go. This was a great project to do before bedtime and kept the kids entertained.

What You Need

Construction Paper
Paint
Googly Eyes
Marker
Cute Little Feet

What To Do

1. Paint those piggies and place the foot on the construction paper.

2. Glue the googly eyes onto the top of the ghosts. (Ignore the mess...we get a little crazy with our glue sometimes!)
 
 
3. Draw a circle for the mouth.

4. Hang your spooky artwork.

Wednesday, October 24, 2012

Rollout Sugar Cookies

I have been afraid to make these cookies for quite some time. I think the reason that my mother is a baker extraordinaire has always sent me running from any type of baking. This recipe came from her and suprisingly it was very easy and pretty fool proof! Alivia had a blast making them and enjoyed sharing them with her cousins who were in town. Lucky for us the recipe only makes about 2 dozen medium sized cookies so they were gone in a couple of days.

Ingredients

1 c. oleo
1 c. sugar
1 egg
2 t. baking powder
1 t. vanilla
3 c. flour

Frosting - Powdered sugar, milk, food coloring

Instructions

Preheat oven 400 degrees. In large bowl cream butter and sugar. Beat in egg and vanilla. Add baking powder and flour one cup at a time, mixing after each addition. The dough will be very stiff, blend last in by hand. Do not chill, divide dough into 2 balls. On a floured surface roll each ball flat. Bake until cookies are slightly brown on edges.


We did a simple frosting for the cookies. I mixed about 3 tablespoons of powdered sugar, 1 teaspoon of milk (want slightly runny), and food coloring of color choice. Once I had the frosting the color and consistency that I liked I put into a plastic baggy and snipped the end with scissors to create a frosting bag. It was messy....but fun! Enjoy!!!

Monday, October 22, 2012

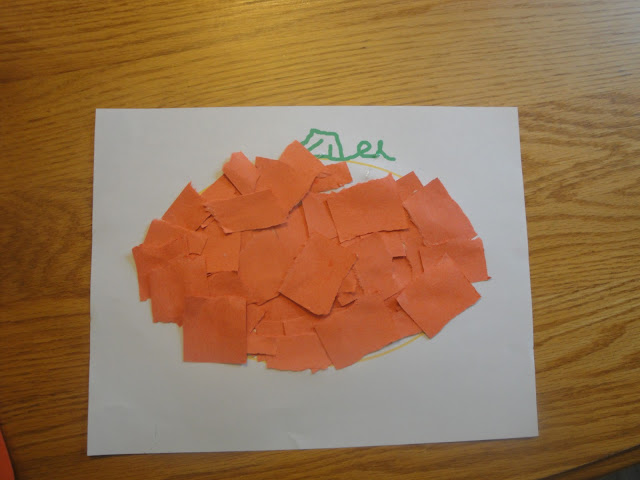
Pumpkin Mosaic

Our 3 year old is getting very good with the scissors. A lot of the projects we did do over summer involved her cutting something. So this project started with her cutting strips of orange paper and then we tore them into smaller pieces. Baby brother who is 1 year old even helped with that process.

What You Need

Construction Paper
Scissors
Glue
White Paper


Directions

1. First you need a picture of a pumpkin. You can either search for a coloring page online, freehand a pumpkin yourself, or if someone could tell me how to attach a pdf of what I used I would be happy to share my quick drawing (I am not sure how to do this!).

2. Once you have your template have your little one cut/tear out tiny squares of paper. Both Liv and I cut strips of paper about an inch wide and then tore the paper into smaller sections.

3. Using glue adhere the tiny squares onto the pumpkin until it has been filled in.


4. Sit back and enjoy your fine piece of art!


Sunday, October 21, 2012

Pumpkins, Pumpkins, Pumpkins!

We finally did something with a couple of the pumpkins we have been stockpiling over the past couple of weeks. Both of the kiddos love to paint and instead of just letting them slather it on I like to make it a little more interesting. Before we got started we just simply placed some stickers onto their pumpkins and let them paint away. Once the pumpkins were dry we peeled off the stickers and tada....fancy schmancy personalized pumpkins. We use Crayola kids paint and it works great. This project is fun for all ages. It was fun for our 1 year old as well as for Great Grandma who stopped by :)


Friday, October 19, 2012

I'm Back!

Well it has been quite the summer and when the weather is nice we tend to spend as much time as possible outdoors. We did do a few projects here and there and when I find the pictures I will post them. Most of our days in the summer are full of playing in the kiddie pool, writing on the driveway with sidewalk chalk and blowing bubbles. Liv also got pretty good at pedaling her tricycle around. So maybe a real bike (with training wheels of course) is in her near future. In the meantime we will continue avoiding the bike aisle at the store because she is begging for one :) I hope you had a great summer. Get ready for some fun fall projects!

Wednesday, May 30, 2012

Mother's Day Gifts

One thing I have learned when it comes to gifts to the Grandparents is that they love the homemade gifts. Especially my Mom. And the look on Alivia's face when she gives those gifts is priceless. This year we painted some of the wooden knick knacks I had picked up when browsing the Target "One Spot". This birdhouse was fun and easy and looks great hanging out with Grandma's house plants. To mix things up a bit we painted the house one color and then took a sponge and painted overtop for a textured look. I kind of wish I had one of my own now!

Tuesday, May 29, 2012

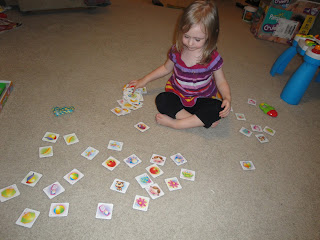
Playing Memory...Toddler Style

I loved the game Memory as a kid and couldn't pass it up when it was one of the deals on Black Friday a couple of years ago. Liv is just now starting to get into playing by the actual rules but on days when we just don't quite have the time we go back to playing our simplified version.

Start by laying all of the cards face up and match away. Sometimes we take turns, sometimes we just find what we can, and on days like today I tell her which picture she needs to find. It is always a good time. Even when little brother escapes with a couple of the pieces!

Friday, May 4, 2012

Fingerpaint Art


I am going to call this a trial run because I really like how this project turned out and I think it would be cute on a little canvas in Alivia's room. This project is super fun, super easy, and super messy. Three things I really like!

What You Need

Painters tape
Fingerpaint Paper (or any type of paper that will allow the tape to peel off easily)
Fingerpaints

Directions

1. Using the painters tape mark out a design on your paper. We made the letter A since we are working on writing Alivia's name.


2. Squirt fingerpaints onto the paper and start painting.


3. Once your project is dry carefully peel back the tape revealing your design.


The possibilites with your design for this project are endless so have fun!

Tuesday, May 1, 2012

Happy May Day!

In honor of May Day we decided to make these cute little flowers. Plus we have tons of tissue paper lying about after celebrating Liv's birthday. This project was a lot of fun and really easy to do.

What You Need

Tissue paper
Glue
Safety Scissors (if your kiddo is learning to cut)
Construction Paper
Marker/Crayon

Directions

1) Cut a piece of green construction paper in half and draw lines for your little one to follow as they cut.

Looks are deceiving I actually had to help her cut most of the time.

2) Glue the lines to a sheet of paper.


3) Cut the tissue paper into approx 4 inch squares (I cut these out myself). Have your little one wad the paper up into a ball.

4) Glue the tissue paper onto the green stem to create your flower. We glued an additional wad of paper into that to add a little more dimension.

5) Sit back and admire. Or have your little one decorate the remaining paper with colors, markers, stickers, etc.


Happy May Day!

Monday, April 30, 2012

Puppy Chow

This was the snack we made to fill Alivia's birthday treats. This snack is really easy and always seems to be a hit.

What You Need

1/2 cup peanut butter
1/4 cup butter
1 cup chocolate chips
1/2 teaspoon vanilla
9 cups Crispix/Chex Cereal
3 cups powdered sugar


Directions

1. Combine chocolate chips, peanut butter, and butter in a microve safe bowl. Microwave for 30 second increments. Stir every 30 seconds until all ingredients are blended thoroughly.

2. Add 1/2 teaspoon vanilla. Stir well.

3. Place the 9 cups of Crispix/Chex into a very large bowl.

4. Pour the chocolate/peanut butter mix over the cereal and toss evenly. Be sure the the cereal gets a good covering.

5. Place the powdered suger in a large zip-lock bag.

6. Add the chocolate/peanut butter mix to the bag. Be sure to leave enough room for the puppy chow to be shaken (we used two separate gallon size baggies for this).


7. Shake the bag until each piece is coated with powdered sugar.


8. Eat and enjoy!

This was always a favorite growing up. But seriously what is not to love. Peanut butter and chocolate are two of my favorite things.

WARNING: Hide the extras because there may be a temper tantrum in the morning when "Puppy Chow" is not on the menu.


Thursday, April 26, 2012

Birthday Interview

Today Alivia turned 3. We spent part of the afternoon at the Children's Museum (love that place) and then had pizza and cake for dinner tonight. I also got to scratch an item off of my to do list. A while back I came across the idea of interviewing your child on their birthday. So I compiled a list of questions, set up the video camera, and asked away. It was fun to hear her response to my questions. Honestly I have no idea where she comes up with half of the stuff she comes up with. Hopefully I can remember to do this for many years to come. If this sounds like something you would like to try with your tot here are some questions to get you started (and Alivia's responses just for fun).

1. What is today?     My Happy Birthday
2. How old are you?     This many(holds up 3 fingers)
3. What makes you happy?     Sundays and playing iwth daisylions (aka weeds)
4. What is your favorite flower?     Daisylions (aka weeds)
5. What do you like to do?     Play with toys and playdoh
6. What is your favorite food?     Pizza with sauce and black olives
7. What is your favorite animal?     Elephant, baby elephant
8. What is your favorite color?     Purple
9. What is your favorite show?     Dora, Jake and the Neverland Pirates
10. What is your favorite song?     Twinkle Twinkle Little Star
11. What is your favorite book?     Curious George - when he gets in trouble for feeding the animals
12. What is your favorite toy?     Watertable
13. What do you like to do with your mom?     Play
14. What do you like to do with your dad?    Play
15. Where is your favorite place to go?     Zoo
16. What do you want to be when you grow up?     Cinderella

Of course this is the short version of the interview. Some of her responses went on and on and on. What I love the most is that someday when she is grown up I will be able to watch this video and hear that sweet voice. Happy Birthday Baby Girl! Mommy loves you!

Wednesday, April 25, 2012

Butterfly Treats

Tomorrow Alivia turns 3! I think the day before the actual birthday may be just as busy as the day of. My evening was full of baking and crafting. Tomorrow Alivia will go to school (daycare) in the morning and no birthday is complete without taking treats for all of your friends! This craft was a lot of fun and really easy.


What You Need

Ziploc baggies
Clothespins
Paint
Snack (cereal, candy, or in our case "Puppy Chow")
Pipe Cleaner
Your Imagination

Directions

1) We started this project out by having Liv paint all of the clothespins while I got busy making the snack to go inside.

I am pretty sure she is painting her hand here!


2) Stuff each sandwich size Ziploc baggie with about 1 cup of the snack.

3) Twist the baggie in half making sure to evenly distribute the snack on each side.

4) Secure the center with a pipe cleaner that has been cut in half (this will become the butterfly antennas).

5) Place clothespin over pipe cleaner.

6) Finish decorating however you choose.


Don't they look so cute all together? I am sure Liv's classmates are going to love them!