I have made personalized shirts for many occasions. It is so easy to do and very inexpensive. Also, I am always last minute and never have time to order a personalized shirt elsewhere.
To make a personalized shirt you will just need to pick up fabric transfer paper in the printer paper isle of your local store. The fabric transfer paper comes in "dark" and "light". I recommend using the "light" if you are working with a white or even pink (in my case) shirt.
When I went to make Bennett's birthday shirt I realized I only had dark fabric transfer paper on hand (that last minute trait coming through again!). So obviously I did not use my "use light" recommendation :) However the shirt still turned out okay and Bennett loved it which was the point!
The design part of making a personalized shirt is easy. I opened a blank word document and played around with fonts for my lettering. I then searched Google Images to find the picture that I wanted. I copied the pictures and then pasted them onto my word doc.
Be sure to read the directions that come with your fabric transfer paper before printing. The "light" fabric paper needs to be printed as a mirror image. The "dark" fabric paper can be printed as normal. I have forgotten this simple trick many times in the past which can make a fun and easy project...really frustrating!!
I also like to print a couple tests on less expensive printer paper. That way I know exactly what I am wanting and I can measure it out on the shirt before I commit.
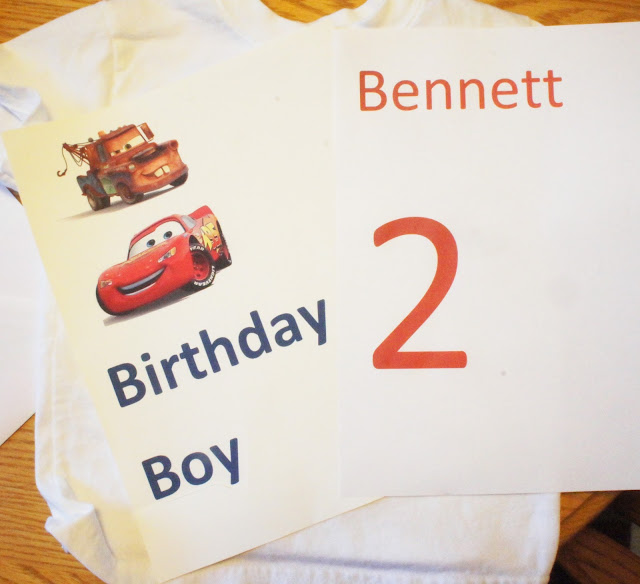
(Everything laid out prior to ironing.)
(The happy birthday boy!)
In the past I have used this method for the monthly baby picture onesies, to personalize Bennett's stuffed bear, and to mark other fun occasions.
If you have a chance I would love to hear of other ways that you may personalize things.


No comments:
Post a Comment